Split Nut Driver
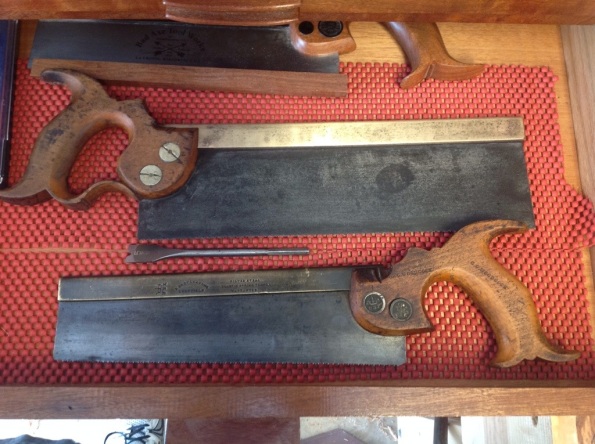
A couple of months ago I picked up a couple of saws from Hackney Tools. These were two R. Groves saws made in the late 1700s to early 1800s.
Through others posts I knew these saws had a good reputation, but until I had them in hand no idea of the wonderful balance and heft of the saws. The weight from the brass back is exactly correct to enable the saw to glide through the wood. Needing to tighten the handles on one of the saws I soon realized that they were held together by traditional split nuts.
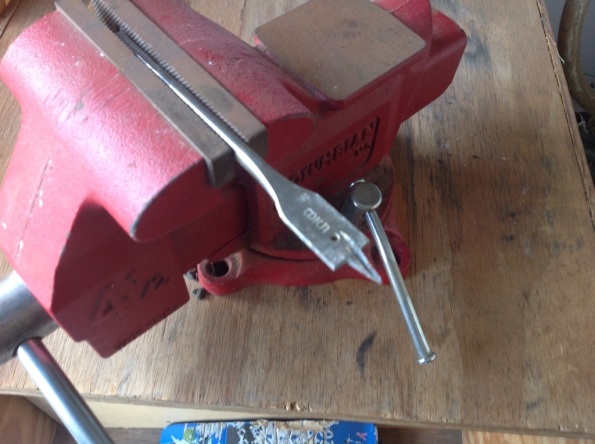
A little research and it became clear that several people make split nut drivers. however it was also clear that making your own would not be difficult. Digging through my boxes of “soon to be useful” material,
I stumbled upon several old drill bits that were wide enough to make the driver. Several minutes with a file and there it is….a split nut driver!
The saw handle came off easily and after some light cleaning it was reattached and is now tight. I’m thinking a handle would go well on the driver but I have yet to figure out how to stop it from spinning in a handle. Thoughts for another day…..


Epoxy will hold the shaft just fine. Drill the hole slightly over-sized. You could also make a blade shape on the end of the shaft and gently push that into the handle for extra holding power if you feel the need.
Thanks, I wondered if that would work but with no Epoxy Experience hoped someone would give me advice.
You inspired me to use a spade bit as well for a wider blade for a chip breaker screw. Without something mechanical you’ll probably get spinning eventually as I’ve found when making knobs. Use 2 pieces of wood for the handle, mortise out one side to fit down to the flat section of the spade bit. Clamp them together and drill a hole through both pieces and the bit and use either a brass screw or rod to tightly fit through. After gluing them together with either epoxy or gorilla glue you can smooth the brass with files/sandpaper and have a custom driver — I’m putting it on my list of things to do next!
Can’t wait to see how these turn out.
Hi Richard, Enjoying watching the clean up. Glad you’re happy with them, they deserve to go to someone who will use them. I have a load of Record vices now, but collection only I’m afraid, due to weight!!!
All the best
Gary
http://www.hackneytools.com
I found one of these nuts on a clock, did not know what to call them.